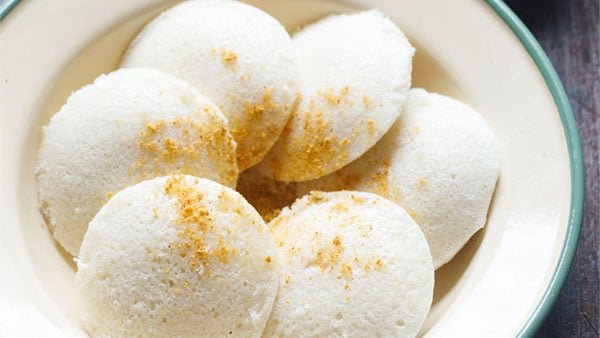
Idli is a traditional South Indian breakfast dish ready from a fermented batter of rice and urad dal (hulled black gram), steamed into delicate, ethereal, and spongy truffles. It’s generally loved with Coconut Chutney and Sambar, making for a nutritious and satisfying meal. It is one in every of thehealthiest and in style breakfast. Right here I share my foolproof recipe with video and step-by-step pictures that can enable you to in making the perfect idli. This Idli recipe is without doubt one of the earliest recipe from the weblog which has been tried and examined with nice outcomes by lots of our readers.
Tender Idli Made the Conventional Manner
Idli isn’t simply meals — it’s a reminiscence. Rising up, Sundays at residence meant the comforting rhythm of idli-making. My mother would soak rice and urad dal through the day, and by evening, the acquainted whirr of our previous Sumeet mixer would fill the kitchen as she floor the batter.
I nonetheless keep in mind that earthy aroma of freshly floor urad dal — so distinct, so comforting. Even at this time, after I put together the batter, I’m immediately transported again to these evenings, watching her pour the thick batter into a big bowl, gently mixing in salt, and setting it apart to ferment in a single day.
Sunday breakfast was all the time a celebration of soppy, steaming sizzling idlis; generally adopted by crisp dosas from the identical batter. Any leftovers would magically flip into scrumptious uttapams or paniyarams the following day.
It was easy, soulful meals made with love; a rhythm I proceed in my very own kitchen at this time. Together with these reminiscences, this recipe brings collectively time-tested method and cautious fermentation so your idlis end up delicate and fluffy each time.
Idli is my consolation meals – easy, nourishing, and timeless. Naturally vegan, gluten-free, and lightweight on the abdomen, it’s additionally one of many healthiest breakfast choices round. This traditional South Indian dish has discovered followers not simply throughout India, however around the globe.
Idli is a delicate, steamed savory cake comprised of a naturally fermented batter of parboiled rice and urad dal (hulled black gram). It’s a staple South Indian breakfast identified for being mild, nutritious, vegan, and gluten-free.
The method entails soaking rice, fenugreek seeds and lentils, grinding them right into a superb, thick batter, fermenting it in a single day or for 8 to 9 hours, after which steaming the batter in idli moulds. The result’s a fluffy, spongy, and mildly tangy idli that pairs fantastically with coconut chutney and sambar.
This put up walks you thru the standard means of creating idli with rice – so you may recreate the identical delicate idlis I grew up consuming.
Overview of the Idli Making Course of
Making idli the standard means entails 4 key steps: soaking, grinding, fermenting, and steaming. Whereas there are shortcuts out there at this time, nothing fairly matches the delicate texture and lightweight tang of a correctly fermented home made batter.
There are two time-tested approaches: one utilizing idli rice, and the opposite utilizing idli rava. Each yield wonderful outcomes and observe the identical foundational technique.
1. Idli with Rice and Urad Dal
This traditional model makes use of idli rice paired with hulled urad dal (black gram). Idli rice refers to parboiled rice, historically utilized in making delicate idlis.
You need to use both complete or break up urad dal. Each work properly so long as they’re contemporary. Aged lentils don’t ferment correctly and may result in dense idlis.
Some residence cooks use short-grain kinds of uncooked rice like parmal rice or sona masuri rice, which additionally give a delicate texture. The batter is floor to a superb consistency and blended with salt earlier than fermenting.
2. Idli with Idli Rava
A barely simpler technique makes use of idli rava, which is coarsely floor parboiled rice. It skips the rice grinding step, making it faster whereas nonetheless producing delicate, fluffy idlis. Simply soak the rava and urad dal individually, then grind solely the dal earlier than mixing and fermenting.
Soaking, Grinding & Fermentation Suggestions
Every stage performs a job in getting good idlis — delicate, spongy, and lightweight.
1. Soaking Suggestions
Rinse each rice and dal properly and soak individually for 4 to five hours. Use contemporary urad dal for greatest fermentation. Poor-quality or aged dal typically leads to chewy, flat idlis.
2. Grinding Strategies
a) Stone Grinder: Perfect for giant batches. Produces fluffier batter with higher fermentation. Add water step by step — round 1 cup for ½ cup urad dal and 1.5 to 2 cups for two cups soaked rice.
b) Mixer Grinder (Mixie): Good for small batches. A superb mixie or high-speed blender like Vitamix does the job properly with cautious method.
Personally, I generally use the stone grinder for bigger portions and the mixie for on a regular basis batches. Each strategies work splendidly once you use the right ratios and permit correct fermentation time.
3. Fermenting the Batter
As soon as floor, combine the rice and dal batters totally. Cowl and go away to ferment for 8 to 12 hours or in a single day in a heat place. A well-fermented batter will double (and even triple) in quantity and have a mildly bitter aroma – good for idli.
The fermentation of idli batter occurs naturally as a result of wild yeast and lactic acid micro organism current on the rice and urad dal. As they multiply, they launch gases and acids that assist the batter rise, giving idlis their signature delicate and spongy texture.
4. Steaming the Good Idlis
Idlis are steamed in greased idli moulds positioned in a steamer or stress cooker (with out the load/whistle). Spoon the batter into moulds and steam till set.
The idlis ought to be steamed for 12 to fifteen minutes; keep away from over-steaming as it will possibly make them dry or dense. To examine doneness, insert a toothpick — it ought to come out clear.
Step-by-Step Information
The way to Put together Conventional Idli at House
Soak the Rice, Lentils & Poha
1. In a bowl or pan take 1 cup parboiled rice and 1 cup common rice. Right here I’ve used the Indian number of sona masuri rice together with parboiled rice.
As an alternative of this proportion, it’s also possible to use general 2 cups of idli rice OR 2 cups of parboiled rice (as proven within the video above).
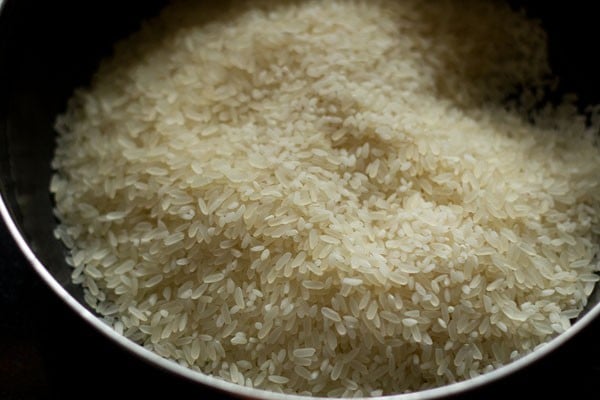
2. Choose after which rinse each the rice varieties a few instances in contemporary water. Drain all of the water and hold it apart.

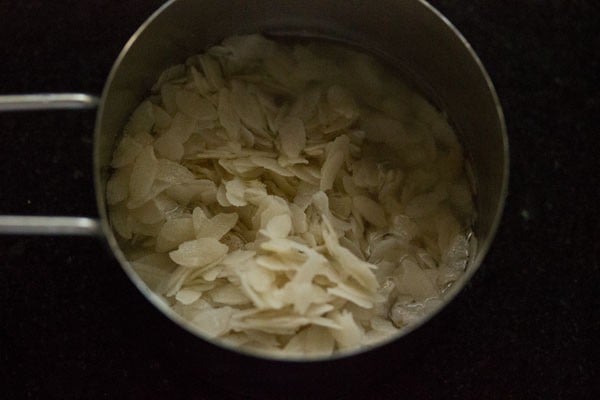
3. Take ¼ cup thick poha (flattened rice or parched rice) in a bowl. Poha helps in making the idli delicate and fluffy. When you don’t have poha then you may skip it.

4. Rinse the poha a couple of times with contemporary water.
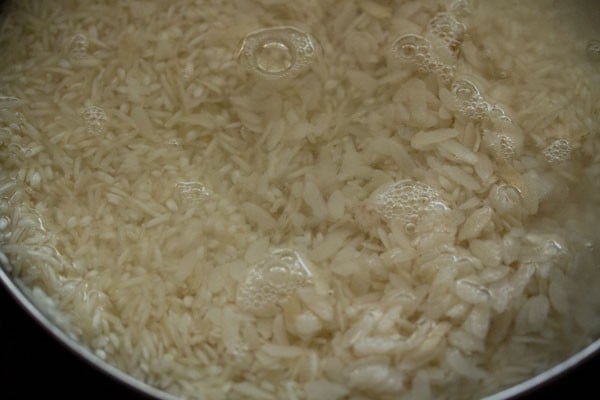
5. Then add the poha to the rice. Add 2 cups of water. Combine very properly and hold apart lined to soak for 4 to five hours.
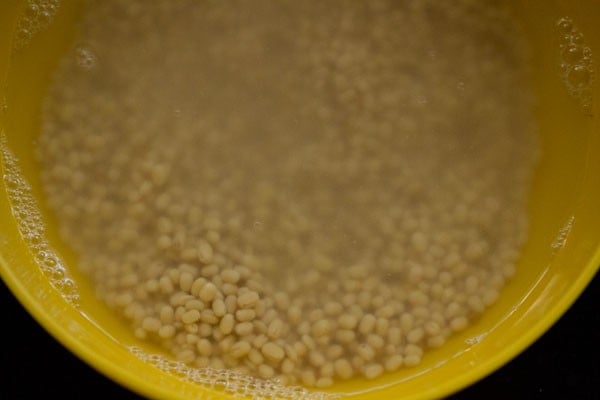
6. In a separate bowl take ½ cup urad dal (husked black gram) together with ¼ teaspoon fenugreek seeds.
Omit the fenugreek seeds in the event you don’t have them.
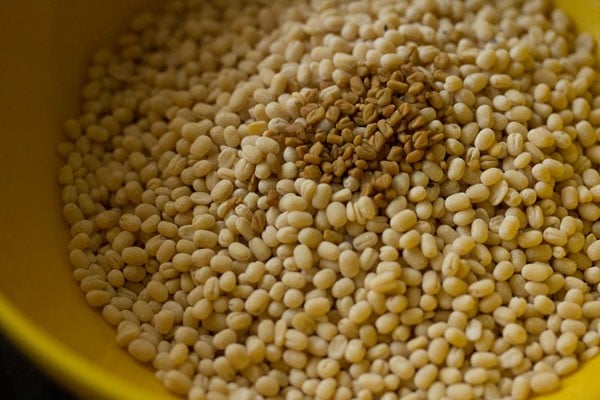
7. Rinse a few instances in contemporary water.
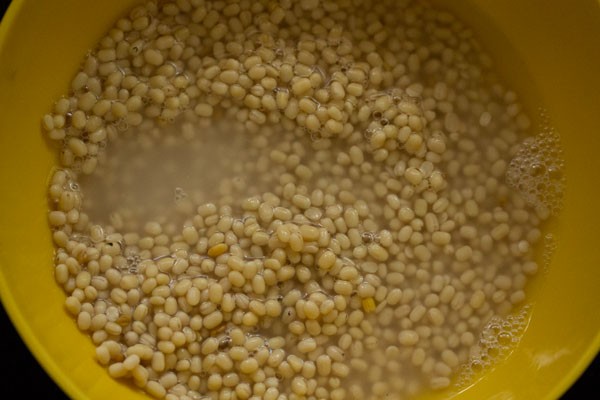
8. Add 1 cup water. Cowl and soak for 4 to five hours.
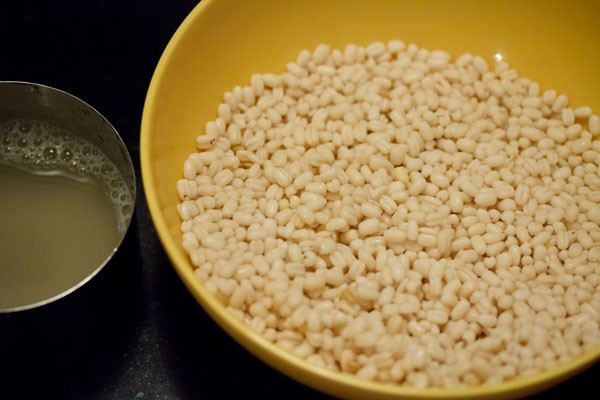
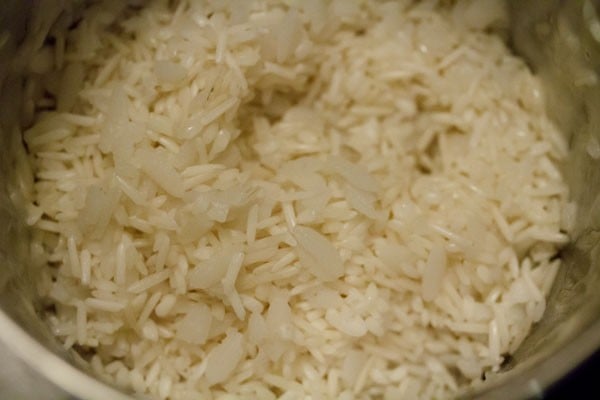
9. Earlier than grinding, drain the water from urad dal, however don’t throw away the water. Reserve the soaked water as we will probably be utilizing this water for grinding or you should utilize contemporary water for grinding.
Grind Rice and Urad Dal Individually
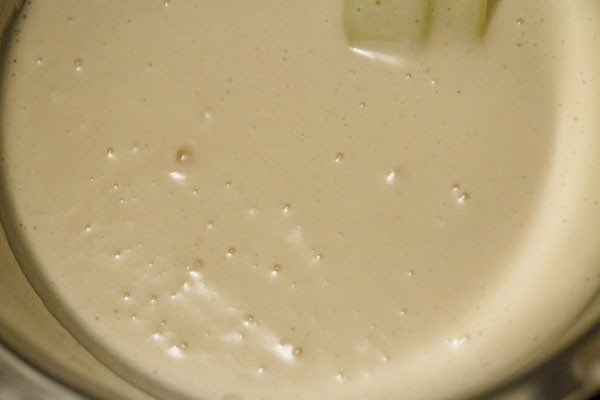
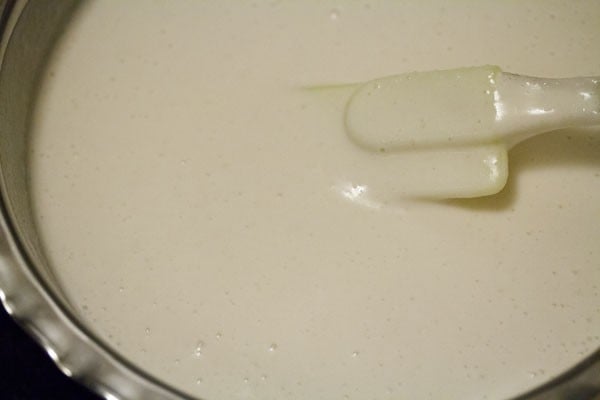
10. In a moist grinder jar, add the urad dal. Initially add ¼ cup of the reserved water or contemporary water.

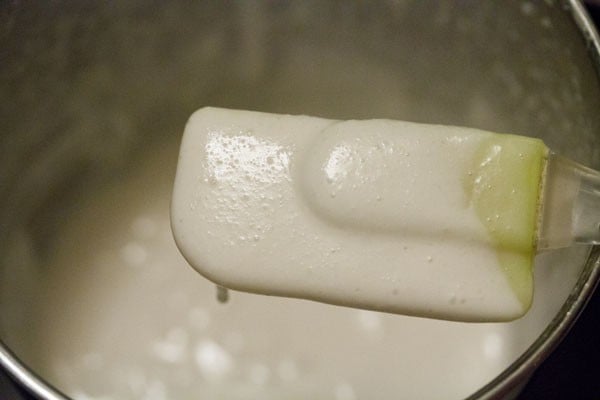
11. And grind the urad dal for some seconds. Then add ¼ cup of the reserved soaked water or contemporary water and proceed to grind. The batter ought to be mild and fluffy when utterly floor.
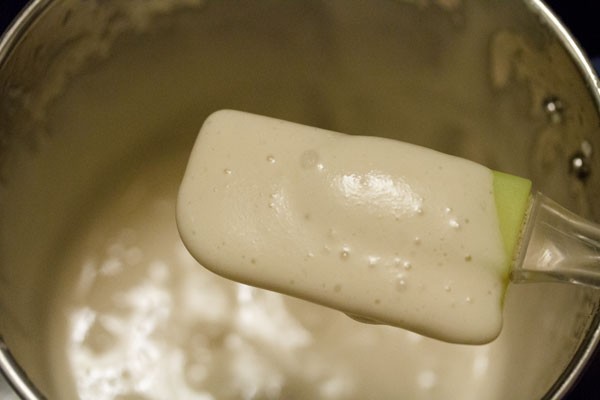
12: Pour the urad dal batter in a deep pan or bowl.
13: Drain the water from the rice and poha. Add them within the moist grinder jar or in a robust blender. I often grind in two batches.
Relying on the capability of your mixer-grinder or blender you may grind in two to a few batches. If the mixie will get heated up whereas grinding, then cease and let it cool. Then proceed with the grinding.
14: Use the reserved urad dal strained water or common contemporary water to grind the rice and poha too. Add water in elements and grind.
The rice can have a superb rava like consistency within the batter. A easy batter can also be superb. I often add a complete of ¾ cup of water whereas grinding rice. The rice batter shouldn’t be too thick or skinny.
You may add about ¾ to 1 cup of water relying upon the standard of rice.
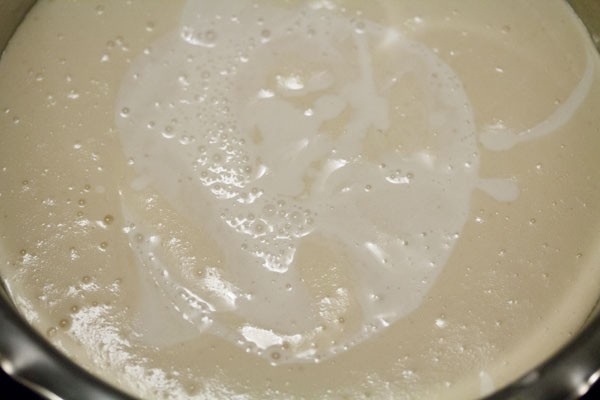
15: Now pour the rice batter within the bowl containing the urad dal batter.
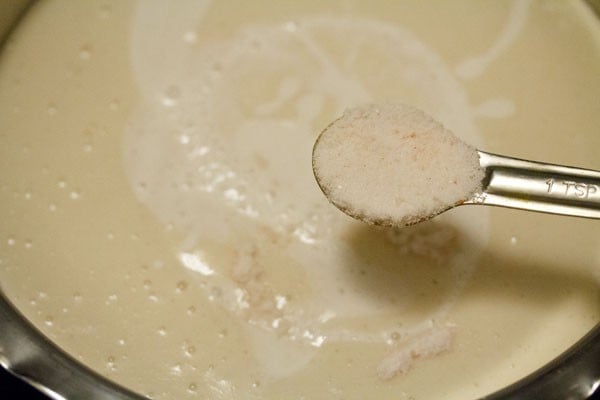
16. Add 1 teaspoon of edible rock salt or pink salt. Combine very properly with a spoon or spatula. When you reside in a cool or chilly area, then don’t add salt. Add salt later as soon as the fermentation is completed.
When you reside in a sizzling or heat local weather, then add salt because it doesn’t permit the batter to recover from fermented within the time length of 6 to eight hours.
Word that salt retards the fermentation course of.
Let the Batter Ferment Naturally
17. Cowl the bowl or container with a lid and hold the batter in a heat place. It ought to be left undisturbed for 8 to 9 hours. Don’t use an air-tight lid. In colder local weather, hold the batter for an extended time – from 12 to 24 hours.
I’ve talked about numerous suggestions under for the idli batter to ferment properly. So do learn this part under after step-by-step pictures.
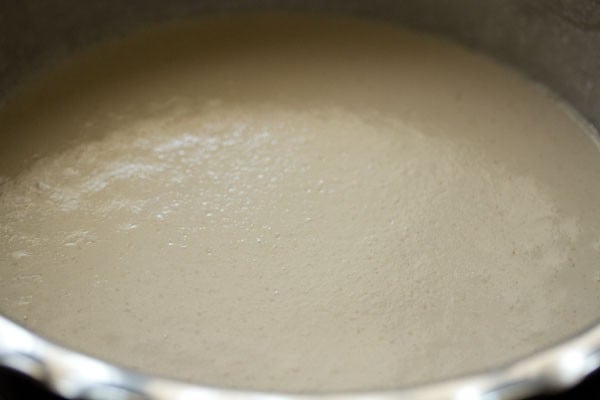
18. The batter the following morning. It’s going to ferment and improve in quantity. A properly fermented idli batter can have a pleasant bitter aroma with many tiny air pockets within the batter.
As quickly because the batter is fermented you may start with steaming the idli or hold the batter within the fridge if making later.
When you permit the fermented batter to stay at room temperature, it’s going to ferment extra and can grow to be very bitter with time.
Steam the Idli to Perfection
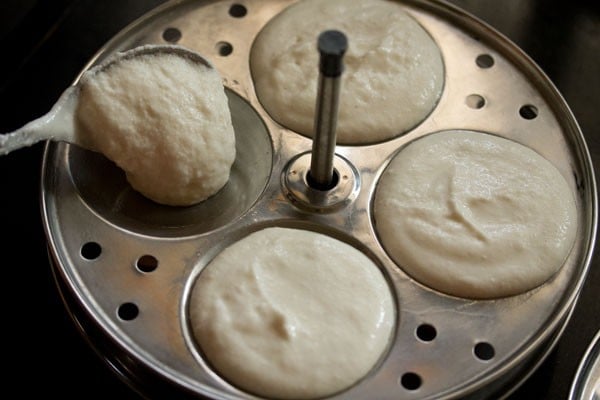
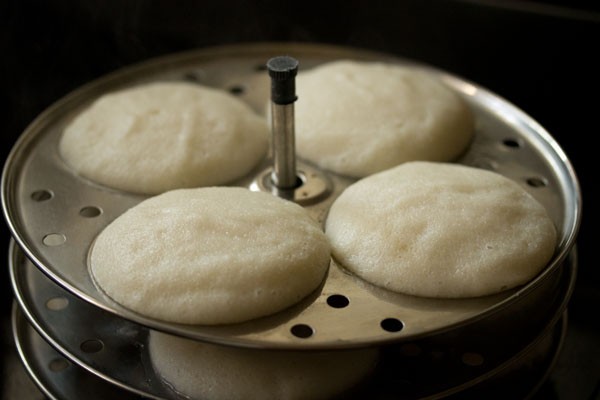
19. Grease or brush the idli mould with oil throughout evenly. Gently and calmly swirl the batter. Don’t overdo. Now with a spoon pour parts of the batter within the greased idli moulds.
20. Take your idli steamer or stress cooker or electrical cooker or Instantaneous pot. Add some 2 to 2.5 cups water and warmth the water till it involves a light-weight boil. Hold the idli mould within the steamer or stress cooker. Steam for 12 to fifteen minutes.
Timing will differ relying on the form of gear you’ve gotten used. If utilizing a stress cooker, then cowl the stress cooker with its lid. Take away the vent weight/whistle from the lid. Steam the idlis for approx 12 to fifteen minutes.
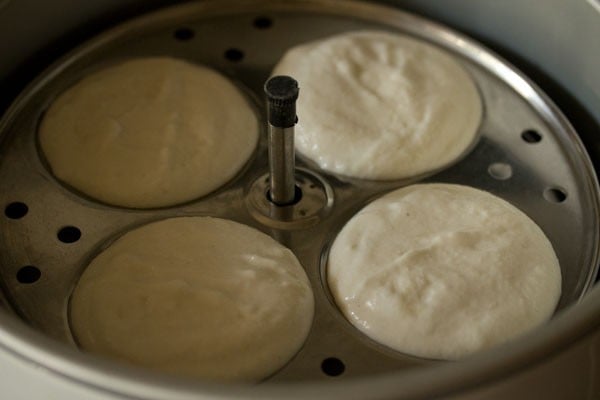
21. Test for doneness by rigorously inserting a bamboo skewer or knife. If it doesn’t come out clear, then hold once more for a couple of extra minutes.
When executed take away the idli mould from the cooker. Don’t overcook as then they grow to be dry.
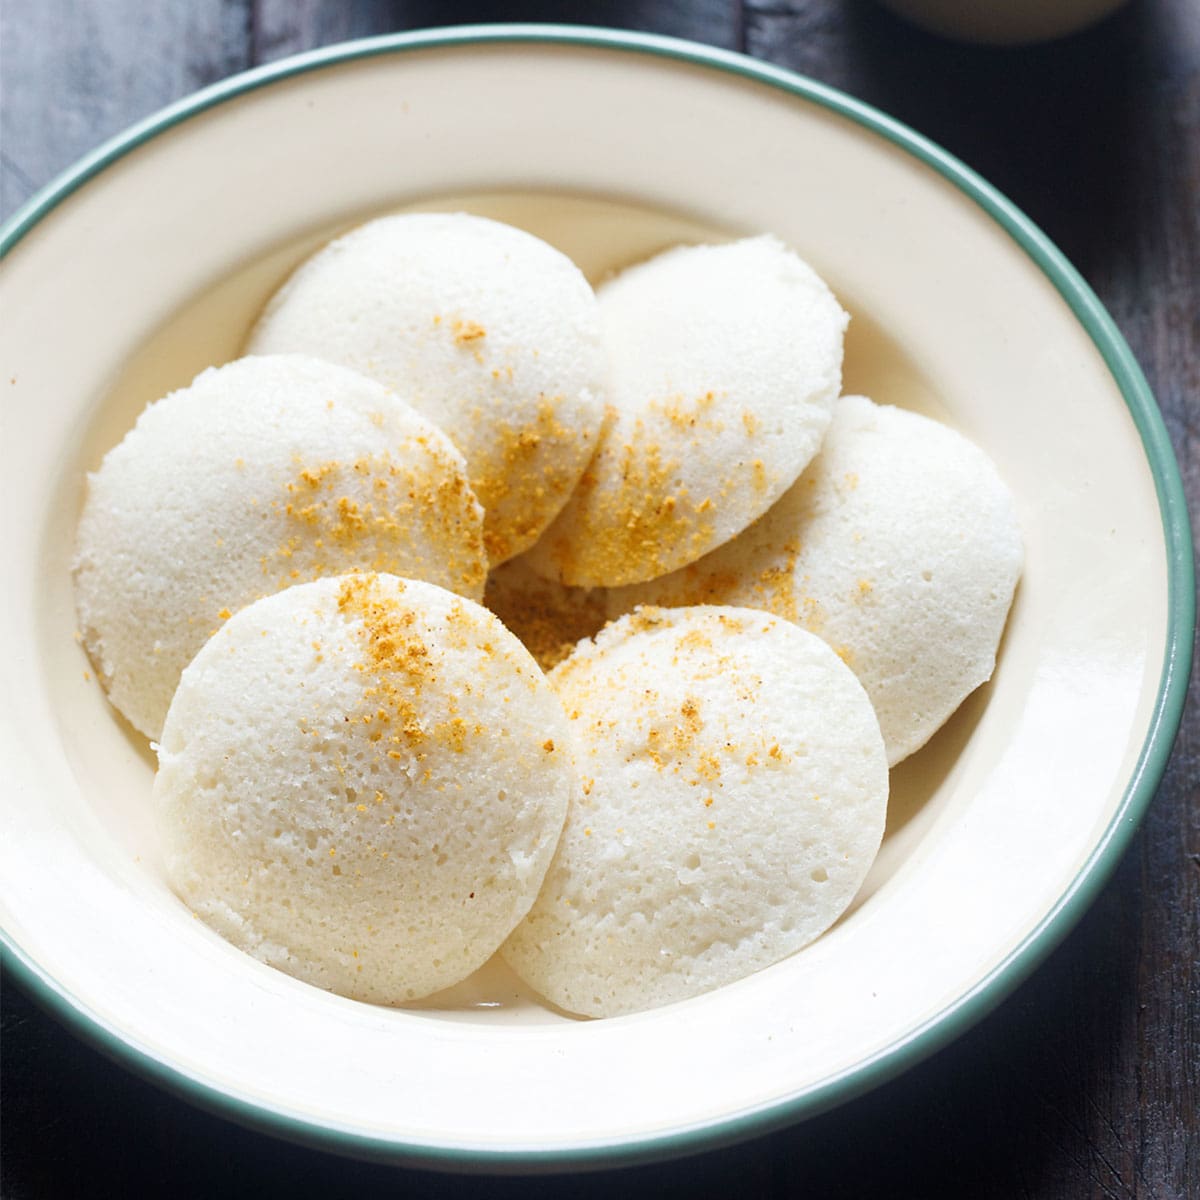
Dip a spoon or butter knife in water and slid them by the idlis. Take away and place the idlis in a heat container like a casserole.
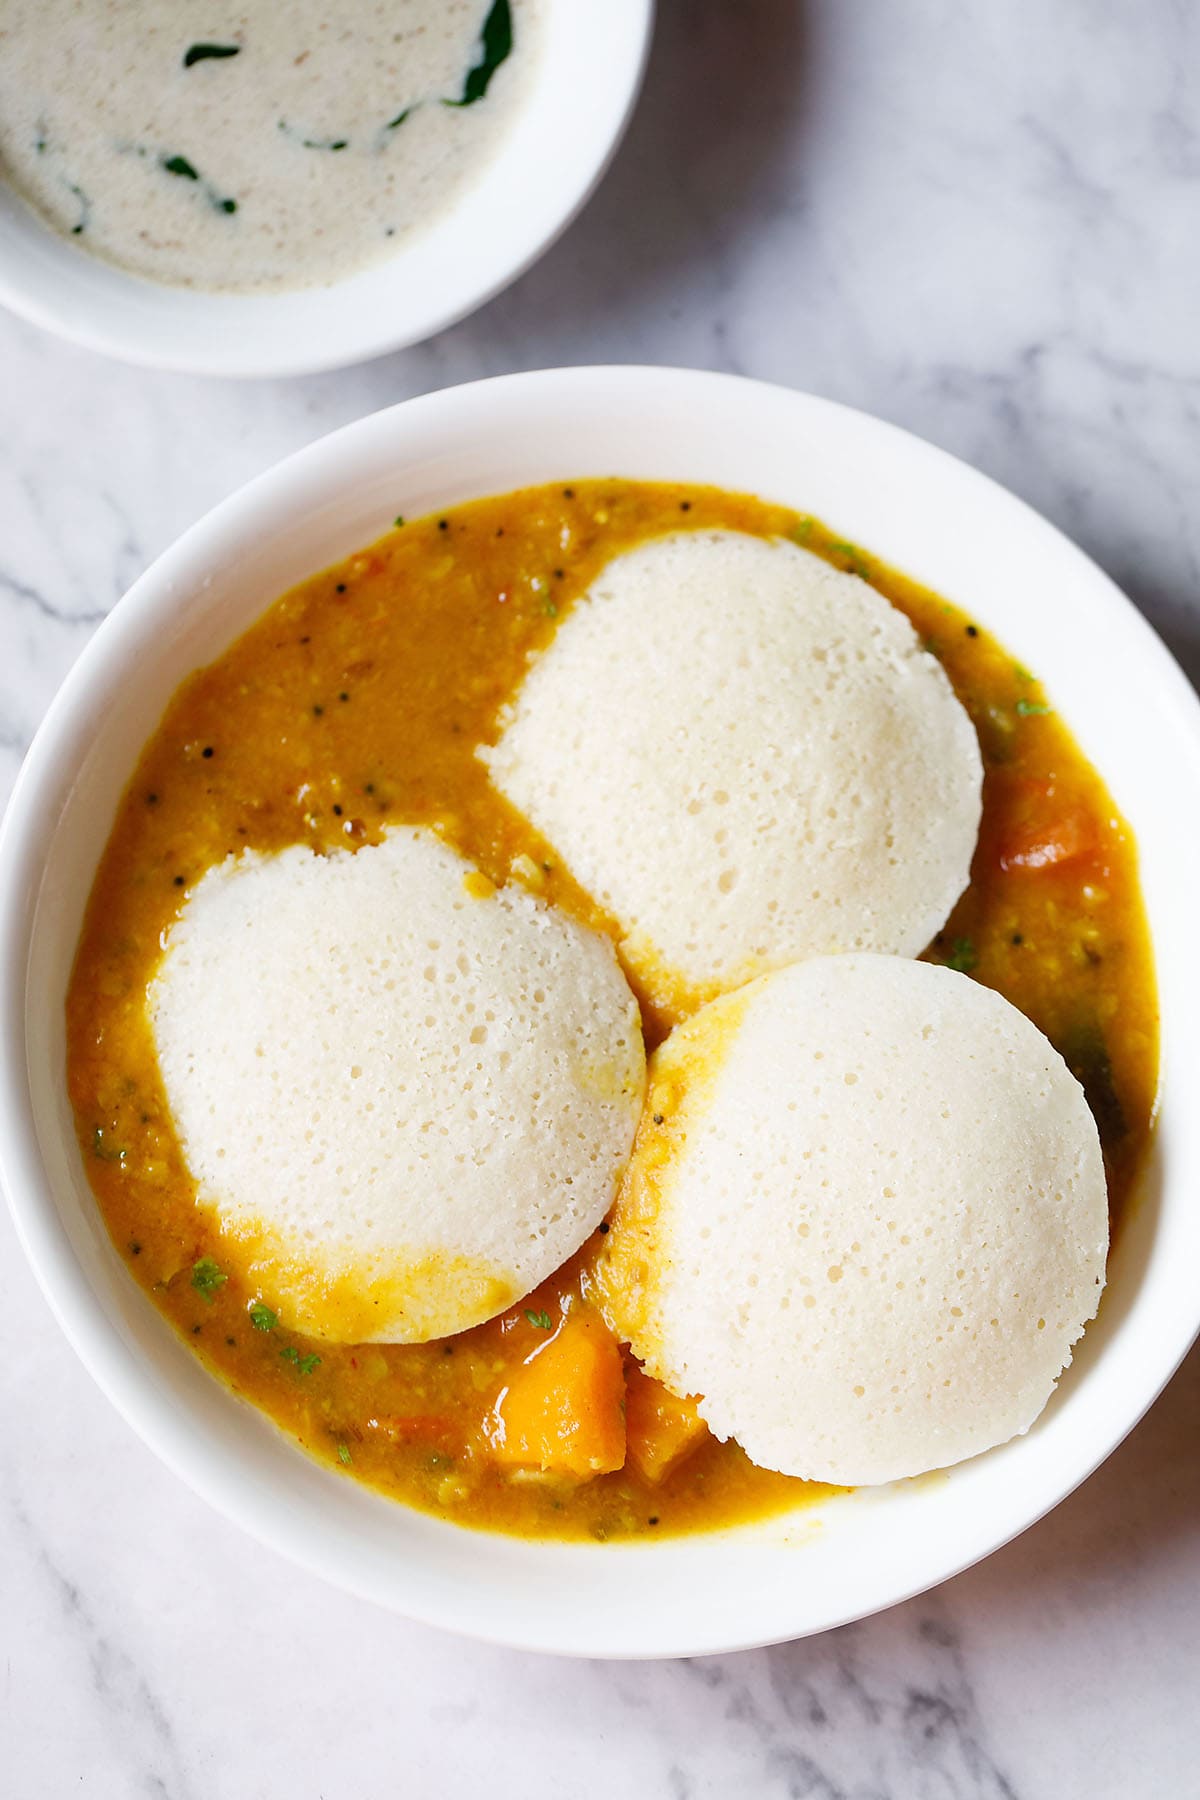
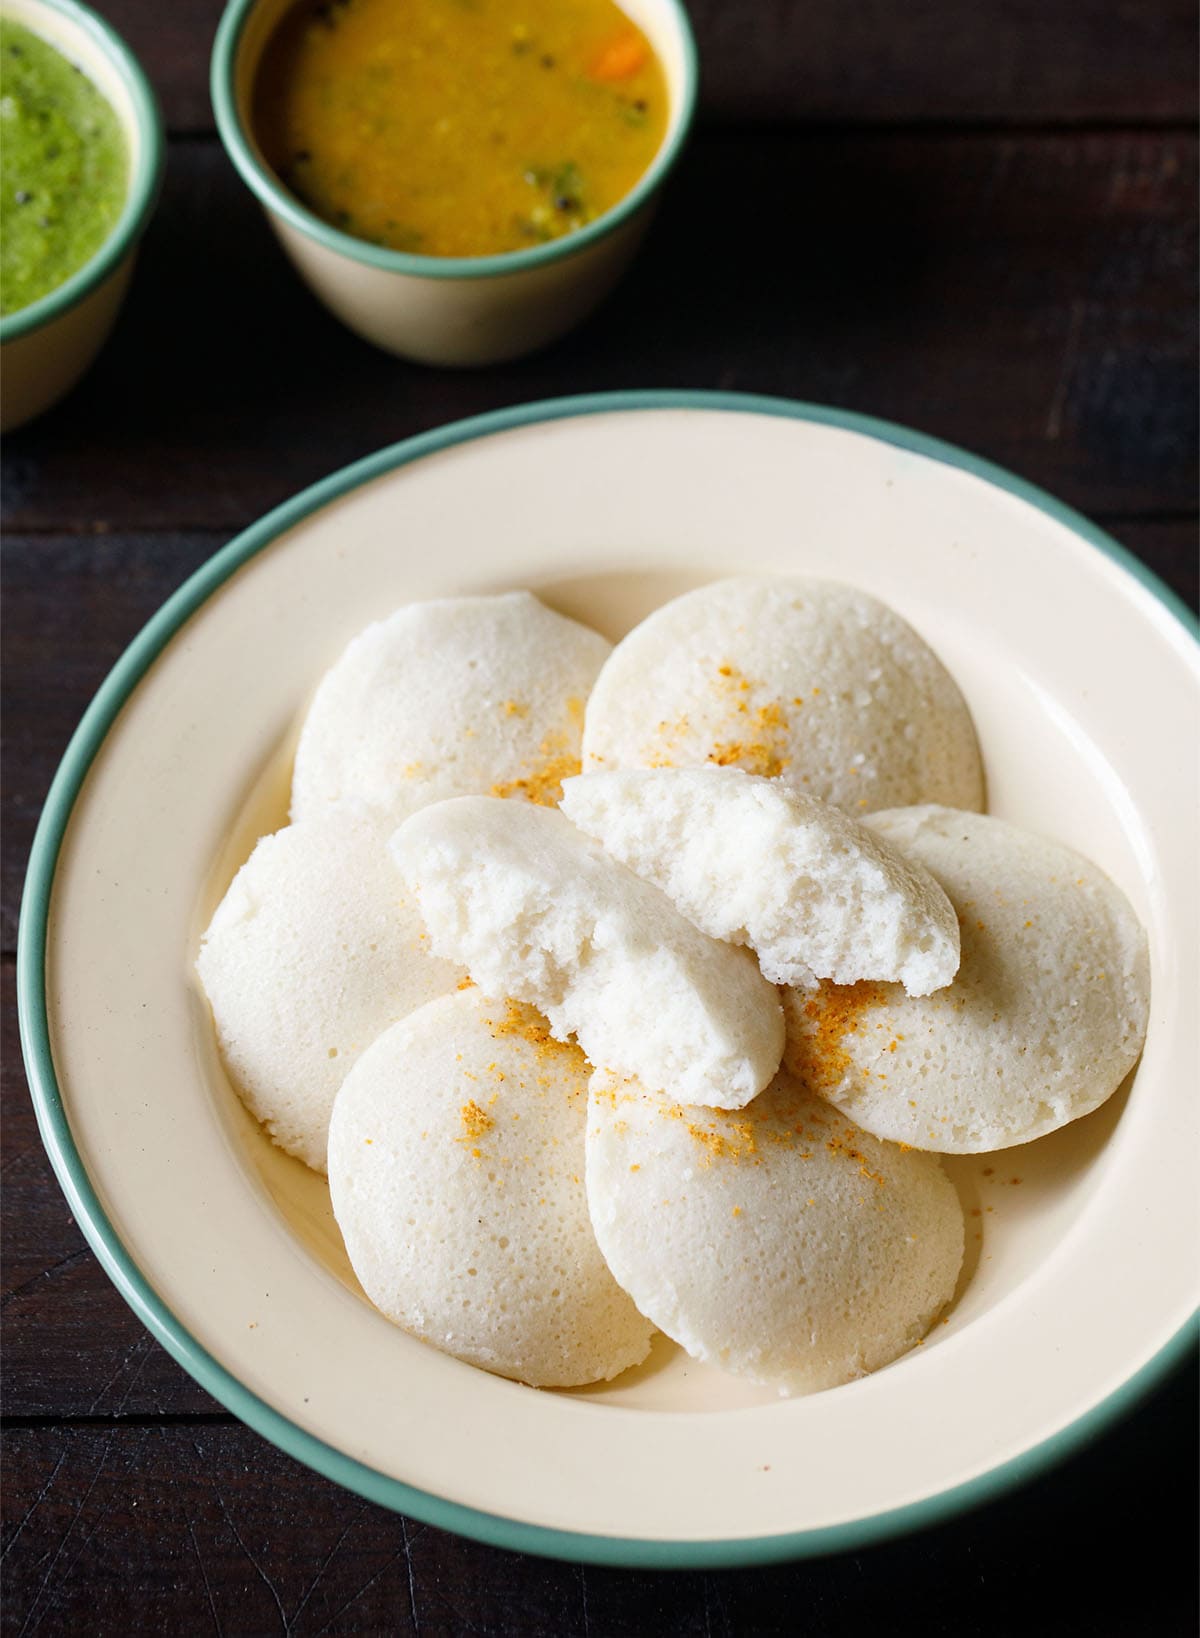
22. Serve Idli sizzling or heat with sambar and coconut chutney.
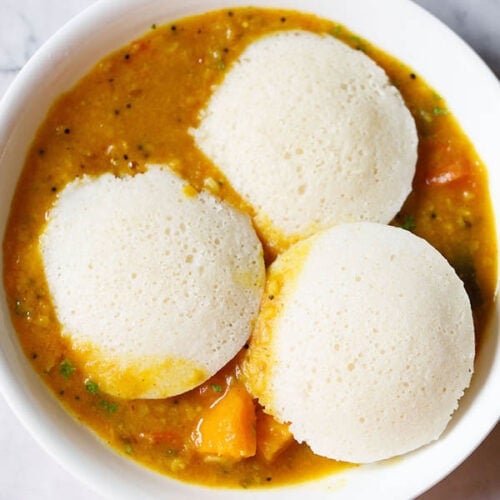
What to Pair With Idli
- Idli is mostly served with coconut chutney and sambar, a traditional pairing that brings out its delicate, delicate taste. Historically, idli is dunked in sizzling sambar and eaten with beneficiant spoonfuls of chutney on the facet.
- There are a lot of variations of each sambar and chutney you may strive; from thick hotel-style Tiffin Sambar to thinner, homestyle variations.
- You can too serve idli with chutneys like Onion Chutney, Tomato Chutney, or Peanut Chutney for selection.
- One other scrumptious and fast accompaniment is Idli Podi – a dry lentil-based spice combine typically blended with ghee or sesame oil.
- When you’re brief on time, a easy plate of idli with coconut chutney and podi is simply as satisfying. In some properties, idli is served with tempered and spiced curd, making for a comforting mixture.
Storing Idli and Batter the Proper Manner
Leftover idlis may be saved within the fridge for as much as 2 days. Place them in an hermetic container and reheat by steaming or microwaving with a sprinkle of water to convey again their softness.
Idli batter retains properly within the fridge for 3 to 4 days. Retailer it in a lined container and produce it to room temperature earlier than utilizing. Stir the batter gently earlier than making idlis, as this helps retain the air bubbles shaped throughout fermentation.
When you’d wish to retailer the batter longer, it may be frozen for as much as 1 month. Use hermetic, freezer-safe containers and go away some area for the batter to develop.
Thaw the batter in a single day within the fridge or at room temperature earlier than use. Take into account that frozen batter might yield barely much less ethereal idlis in comparison with freshly fermented batter.
Inventive Variations You Can Attempt With the Batter
When you grasp the essential idli batter, there are limitless methods to make it your individual. You may add lentils like moong dal to create Moong Dal Idli, or mix in millets and millet flours for a extra healthful twist. I additionally embrace thick poha to make the extremely delicate and fluffy Poha Idli.
When you’re searching for more healthy or gluten-free choices, including millets like ragi (examine my Ragi Idli) or different millets works very properly.
Even oats may be included within the batter for added fiber. I’ve shared an Fast Oats Idli recipe on the weblog that’s good for busy mornings. You can too take a look at this Millet Idli made with foxtail millet for a light-weight and nutritious choice.
You might also take pleasure in exploring these distinctive regional and inventive takes:
- Kanchipuram Idli – Spiced and steamed in banana leaves, this Tamil Nadu-style idli is flavored with cumin, pepper, ginger, and ghee.
- Thatte Idli – A big, flat idli from Karnataka that’s delicate, spongy, and excellent for dunking in sambar.
- Leftover Rice Idli – An effective way to make use of cooked rice, these idlis are delicate, fluffy, and want fermentation.
- Sama Chawal Idli – Made with barnyard millet (sama), these idlis are perfect for fasting days or gluten-free diets.
- Kotte Kadubu – A standard Karnataka recipe the place idlis are steamed in jackfruit leaves for a definite taste and aroma.
Finally, don’t be afraid to experiment. Attempt completely different proportions, additions, and strategies to find what offers you the perfect texture, style, and fermentation in your individual kitchen.
Professional Suggestions
Like I’ve talked about above Idli was a weekend ritual rising up. Each Sunday meant sizzling idlis or delicate dosas with chutney and sambar. Once I first began making them myself, it took some trial and error, however I ultimately discovered what works.
- Including Poha: Add a handful of thick poha or cooked rice to the batter for a softer texture. This step is non-compulsory however makes a noticeable distinction.
- Steaming in Muslin: Decide to steam idlis on a damp muslin fabric for a easy, delicate floor.
- Fermentation: Make sure the batter ferments properly, with a pleasing, mildly bitter aroma and visual rise.
- Rice Kind: Use idli rice or an equal mixture of parboiled rice (idli rice) and uncooked rice for greatest outcomes.
- Lentil Freshness: All the time use contemporary urad dal; aged lentils can result in dense idlis.
- Water Proportion: The quantity of water ought to be good in your batter. Neither much less nor extra. Goal for the right stability.
- Multipurpose Batter: The batter is versatile – make idli on day one, and dosa, uttapam, or appe on the next day.
Fermentation Assist – The way to Repair Batter That Gained’t Rise
Fermentation is a key consider getting delicate, mild and fluffy idli. For correct fermentation of idli batter a heat temperature is apt. In chilly climates, fermentation doesn’t occur properly.
I get lots of queries on ferment idli or dosa batter in winters. So I’ve summarized my experiences within the following factors under:
- Hold the batter heat: Fermentation wants heat. In winter or chilly climates, place the batter close to a heater, in a switched-off oven preheated barely, or inside an Instantaneous Pot utilizing the yogurt mode on the ‘much less’ setting.
- Keep away from salt throughout fermentation in winter: Salt slows down fermentation, particularly in colder temperatures. Add it solely after the batter has risen.
- Add a pinch of sugar or use fenugreek seeds: Sugar helps kickstart fermentation. Soaking fenugreek seeds with urad dal helps the batter ferment higher and quicker by boosting the pure good micro organism and yeast, which additionally makes the batter rise properly and provides it a greater texture.
- If the batter hasn’t risen in any respect: After 12 to 14 hours, if there’s no rise and it’s nonetheless chilly, stir in ¼ to ½ teaspoon of prompt yeast dissolved in a little bit of water. Use the batter instantly and don’t refrigerate it, as it’s going to grow to be too bitter.
- As a final resort, add baking soda: A small quantity (¼ to ½ teaspoon) of baking soda may be added earlier than steaming, however use this provided that fermentation utterly fails.
- Test your urad dal batter: The urad dal should be floor till very fluffy and lightweight. This helps the whole batter rise higher.
- Water ratio issues: Don’t use too little water, as it will possibly result in a thick, dense batter that doesn’t ferment correctly.
- Use an Instantaneous Pot in very chilly climates: Place a small trivet within the Instantaneous Pot metal insert, set the batter bowl on it, and ferment utilizing the yogurt setting. Hold the vent on venting or use a glass lid. In heat climate, this may occasionally take 7 to eight hours; in winter, it will possibly take longer.
Idli Batter vs Dosa Batter – What’s the Distinction?
Although each are comprised of the identical substances, idli and dosa batters have key variations. Idli batter is thicker in consistency and wishes to carry its form when poured into moulds.
Dosa batter, then again, ought to be barely thinner so it spreads simply on a sizzling tawa/griddle. For idli, I often observe a 4:1 ratio of rice to urad dal. For dosa, a 3:1 ratio works properly.
Curiously, you should utilize the identical 4:1 idli batter to make dosa; simply skinny it barely with water after fermentation.
This versatility is what makes the idli-dosa batter a real staple in South Indian kitchens. You can too swap in sona masuri or parmal rice for dosa, and even use idli rava as a substitute of rice.
Leftover idlis are good for fast snacks or lunchbox recipes. Listed below are some artistic and attractive methods to make use of them:
- Fried Idli: Shallow-fry or deep-fry leftover idlis till golden and crisp. Serve with chutney or ketchup for a crunchy snack.
- Masala Idli: Dice the idlis and sauté them in a spicy onion-tomato masala with curry leaves and spices.
- Idli Upma: Crumble the idlis and sauté with mustard seeds, inexperienced chilies, curry leaves, and onions for a fast and satisfying dish.
- Chilli Idli: Stir-fry cubed idlis with capsicum, onion, soy sauce, and inexperienced chilies for a desi-Chinese language twist.
- Podi Idli: Toss heat idlis in a mix of idli podi and sesame oil or ghee for a spicy, flavorful snack.
- Idli Manchurian: Pan-fry idli items and coat them in a candy, tangy Manchurian sauce – good as an Indo-Chinese language appetizer.
Your Idli Questions Answered
Effectively-fermented idli batter ought to double in quantity, have a gentle bitter aroma, and present small air bubbles all through. It’s going to really feel lighter when stirred and look barely risen and ethereal on prime.
This often occurs when the urad dal isn’t floor fluffy sufficient or the batter is just too thick. Be sure to grind the urad dal until very mild and ethereal. Additionally, don’t skimp on soaking time or heat throughout fermentation.
Sure, you may make idli with out poha (flattened rice). Nevertheless, poha or a little bit of cooked rice helps in giving the idlis a extra softer texture. When you skip it, make certain your fermentation is robust and batter consistency is ideal.
If the batter hasn’t fermented after 12 to 14 hours, and the temperature is chilly, you may stir in a small quantity of prompt yeast or baking soda simply earlier than steaming. However solely do that if completely vital, and use the batter instantly.
When you’ve tried this recipe, please charge it within the recipe card or go away a remark under – I’d love to listen to your suggestions. For extra vegetarian inspiration, join my electronic mail updates or observe me on Instagram, Youtube, Fb, Pinterest or X.
Idli Recipe (Conventional South Indian)
Idli is a traditional South Indian breakfast dish ready from a fermented batter of parboiled rice and urad dal (hulled black gram), steamed into delicate, ethereal, and spongy truffles. It’s generally loved with coconut chutney and sambar, making for a nutritious and satisfying meal. Idli is a well-liked Indian breakfast which is filling in addition to nutritious.
Prep Time 9 hours
Prepare dinner Time 25 minutes
Complete Time 9 hours 25 minutes
Forestall your display screen from going darkish whereas making the recipe
Soaking rice and lentils
Choose and rinse each the common rice and parboiled rice.
Rinse the poha and add to the rice.
Add water. Combine properly. Cowl and hold the rice + poha to soak for 4 to five hours.
In a separate bowl, rinse the urad dal and methi seeds a few instances.
Soak the urad dal with methi seeds individually in water for 4 to five hours.
Making idli batter
Drain the soaked urad dal. Reserve the water.
Grind the urad dal, methi seed with ¼ cup of the reserved water for some seconds. Then add remaining ¼ cup water. Grind until you get a easy and fluffy batter.
Take away the urad dal batter in a bowl and hold apart.
Grind the rice in batches to make a easy batter.
Combine each the batters collectively in a big bowl or pan. Add salt and blend properly.
Cowl and let the batter ferment for 8 to 9 hours or extra if required.
After the fermentation course of is over, the idli batter will grow to be double in measurement and rise.
Making idli
Grease or brush the idli moulds evenly with oil.
Pour the batter within the moulds and steam the idli in a stress cooker or steamer.
If utilizing stress cooker take away the vent weight (whistle).
Steam for 12 to fifteen minutes or till the idli is completed.
Serve the steaming sizzling idli with coconut chutney and sambar.
Remaining batter may be saved within the fridge for a few days.
- For normal rice selection – you should utilize sona masuri rice or parmal rice or basmati rice.
- Word that the approximate diet data is for 1 medium-sized idli served as is with out chutney or sambar.
-
Fermentation is without doubt one of the primary elements to get delicate, mild and fluffy idli. Fermentations suggestions for winters listed under.
- Heat: Place the idli batter bowl in a heat place – e.g close to a heater or in a heat place in your kitchen.
- Oven: Preheat your oven at a low temperature (80 to 90 levels celsius) for about 10 to fifteen minutes. Then change off the oven, hold the batter bowl inside and shut the door.
- Lights within the oven: In case your oven has lights, then hold the lights on and place the batter inside.
- Sugar: Including a little bit of sugar does assist in fermenting the batter. On this recipe you may simply add upto 1 teaspoon sugar and don’t fear – the idli received’t be candy.
- Salt: Throughout winters, skip including salt to the idly batter as salt retards the fermentation course of. Rock salt and sea salt are good choices so as to add within the idli batter.
- Fermentation time in chilly winters: In winters, hold the batter for an extended time to ferment, like 14 to 24 hours or extra. Do keep in mind that even when you don’t see the batter doubled or tripled, it is best to see tiny bubbles within the batter. You must also get the standard faint bitter fermented aroma from the idli batter.
- Instantaneous Yeast: You may even add ¼ to ½ tsp of prompt yeast (dissolved in 2 to three teaspoons of water) 30 to 45 minutes earlier than you steam the idli. However do that technique when the batter has not fermented properly. The negatives of this technique is that it’s a must to use all of the batter without delay. Even refrigerating this batter makes it very yeasty and bitter.
- Baking Soda: You can too add ¼ to ½ baking soda after which ferment the batter in chilly seasons.
- Fenugreek seeds: Addition of fenugreek seeds (methi seeds) additionally helps in fermentation.
- Urad dal batter consistency: Urad dal needs to be floor rather well. Urad dal batter needs to be delicate, mild and fluffy. So I recommend to grind each urad dal and rice individually to get delicate and fluffy idli. A properly floor urad dal batter additionally helps in fermentation. Additionally use urad dal which is contemporary and inside its shelf-life. Aged urad dal doesn’t ferment properly and makes the idli dense.
- Quantity of water: Do bear in mind so as to add the correct quantity of water within the batter. If the water is much less, then the idli will grow to be dense.
- Fermenting idli batter in Instantaneous Pot: Press the yogurt choice and use the much less mode. Place a small trivet within the IP metal insert. Hold the bowl with the batter on the trivet. Hold the vent place to venting or you should utilize the Instantaneous Pot glass lid. Set the time for 7 to eight hours. On hotter days, the batter will ferment rapidly. On colder days, it might take a couple of extra hours for the batter to ferment within the Instantaneous Pot.
Diet Information
Idli Recipe (Conventional South Indian)
Quantity Per Serving
Energy 38 Energy from Fats 9
% Day by day Worth*
Fats 1g2%
Saturated Fats 1g6%
Sodium 81mg4%
Potassium 9mg0%
Carbohydrates 8g3%
Fiber 1g4%
Sugar 1g1%
Protein 1g2%
Vitamin B1 (Thiamine) 1mg67%
Vitamin B2 (Riboflavin) 1mg59%
Vitamin B3 (Niacin) 1mg5%
Vitamin B6 1mg50%
Vitamin C 1mg1%
Vitamin E 1mg7%
Calcium 5mg1%
Vitamin B9 (Folate) 1µg0%
Iron 1mg6%
Magnesium 2mg1%
Phosphorus 9mg1%
Zinc 1mg7%
* P.c Day by day Values are primarily based on a 2000 calorie weight-reduction plan.
Idli Recipe from the archives was first revealed on April 2012.

