
Ghee is a kind of clarified butter that’s conventional in Indian delicacies. This nutty flavored and excessive smoke level fats has been used for hundreds of years, with deep roots in Ayurvedic practices. Making desi ghee at house is easy, straightforward and value efficient and can render significantly better taste than commercially obtainable varieties. Comply with together with me as I present you easy methods to make ghee recipe within the conventional Indian manner with the assistance of step-by-step pictures and video.
All About Ghee
Ghee is a type of clarified butter broadly utilized in Indian cooking. It’s made by gently simmering unsalted butter till the milk solids separate, caramelize, and the moisture evaporates.
What’s left is a transparent, golden fats that’s strained to take away the browned solids. This clarified butter has a pleasing aroma, delicate nutty style, and excessive smoke level, making it nice for stir-frying, sautéing, and deep frying.
Historically made at house, ghee is valued not only for its style and flexibility, but in addition for its lengthy shelf life. It enhances each candy and savory dishes throughout Indian delicacies.
Ghee has been made in India for hundreds of years and is broadly used within the Indian delicacies. It has a a lot larger smoke level than common butter, making it a superb fats for prime warmth cooking.
It additionally occurs to be shelf secure (that means no refrigeration is required) and is even acceptable for folks with lactose intolerance.
Ghee can be lauded as an Ayurvedic superfood with anti-inflammatory and digestion aiding properties.
Excessive in Omega-3 and -6 fatty acids, DHA, in addition to in nutritional vitamins A, D, E and Okay, this butterfat breaks the mildew and is even being accepted as a healthful meals by western drugs requirements.
Ghee is so necessary to each Indian delicacies and identification. It’s thought-about to be one of many highest providing within the fireplace rituals which can be known as as as Havan or Homam within the Hindu tradition. Ghee can be part of panchamrit that’s supplied to the deities.
Do word that the desi ghee supplied within the havan ritual must be made out of cow’s milk and never buffalo’s milk. Cow’s milk is taken into account satvik and buffalo’s milk is taken into account tamasic.
Now that you understand how great ghee could be, let’s set about studying easy methods to make ghee at house, we could?

The Significance of Utilizing Cultured Butter
Historically, desi ghee recipe is made out of cultured cream or curd (yogurt) that comes from regionally sourced, grass fed Desi cows.
This cultured cream or yogurt is then churned to get cultured butter. Solely then is the butter heated and sluggish simmered to get ghee.
There was a time I might comply with the age-old course of of creating do-it-yourself cultured butter to make use of for making ghee. Now, because of lack of time, I take advantage of store-bought unsalted cultured butter.
For this ghee recipe, be sure you procure unsalted, grass fed and ideally natural butter from Desi cows, as it will lead to probably the most conventional tasting ghee and will likely be straightforward to digest.
In simply 20 to 25 minutes you possibly can have lovely do-it-yourself ghee that’s so significantly better tasting (and more healthy for you!) than pre-packaged varieties.
Together with do-it-yourself ghee, you may as well learn to make these dairy necessities at house:
How one can Make Ghee
This recipe for making do-it-yourself ghee recipe is sort of easy. That stated, please word that you must stay in your kitchen for the whole lot of this course of.
Ghee can go from caramelized to burnt in a flash! Keep attentive and vigilant so that you get the very best quality ghee round.
I’ve additionally learn that one ought to make desi ghee in the course of the full moon. The energies of the moon are infused within the ghee when you make it on a full moon day.
Let’s start with easy methods to make ghee from butter at house.
Soften Butter
1. Seize a big, heavy-bottomed pot or pan. Chop butter roughly and place within the pan protecting all the floor of the pan evenly. For this ghee recipe, I’ve used a 3 litre (3.17 quarts) pot.
For this ghee recipe, I’ve used 500 grams of unsalted cultured butter. You could possibly scale the recipe to make a small or massive batch by utilizing any quantity of butter. Should you plan to make a bigger batch, be certain to make use of a big pot or pan.
Tip: The pot must be giant and heavy. A smaller pan will trigger the melted butter to spill over whereas effervescent and frothing. A lighter skinny bottomed pan could make the butter or ghee burn too quick.
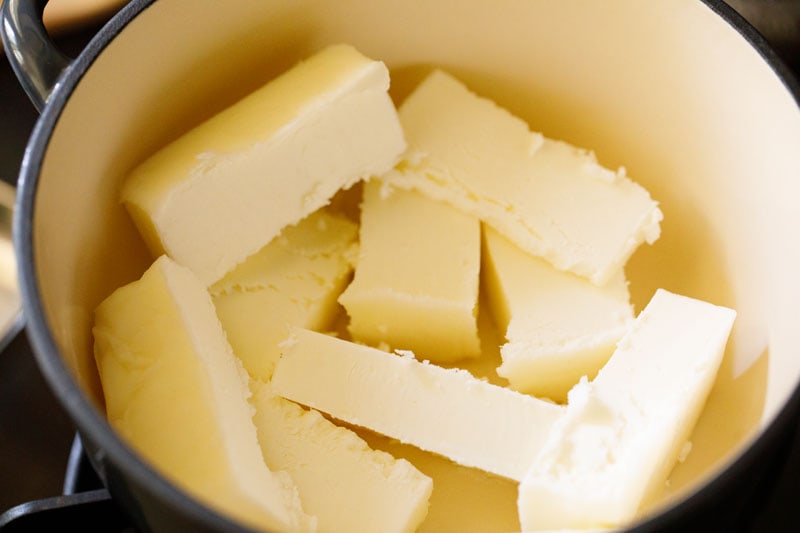
2. Place pan on stovetop and warmth on medium-low to medium warmth. The butter will start to soften.

3. Stir in intervals when butter begins to soften to help the bigger items.
Simmer Butter
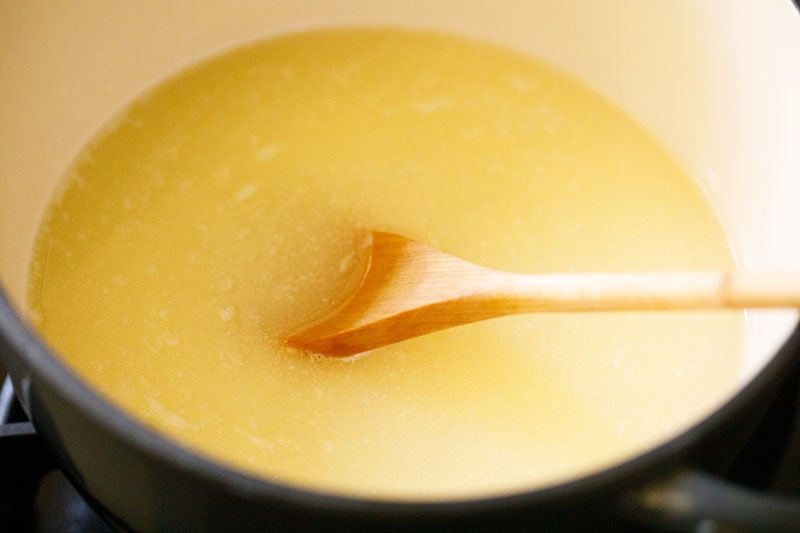
4. When all of the butter has melted, cut back warmth to the bottom setting and simmer gently.

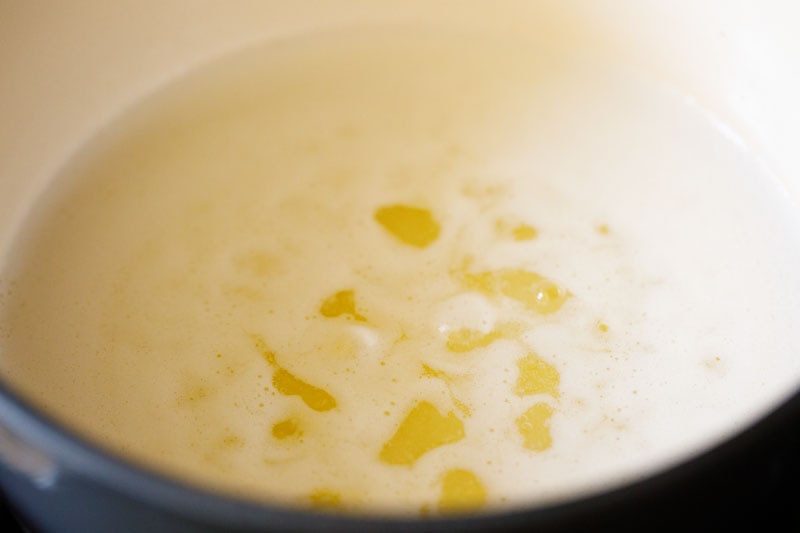
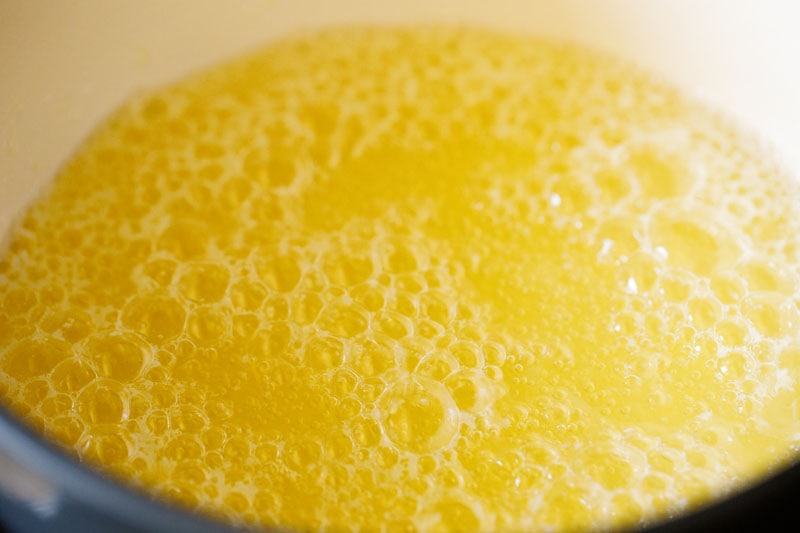
5. A couple of minute or so after all of the butter is melted, you’ll hear sounds from the underside of the pan and see milk solids showing on the floor.
6. All the floor will likely be lined with milk solids. Proceed to simmer.
You will note the colour change regularly to a from a buttery, pale yellow to gentle golden with the butter effervescent and shimmering.
The effervescent and frothing is as a result of water current within the butter.
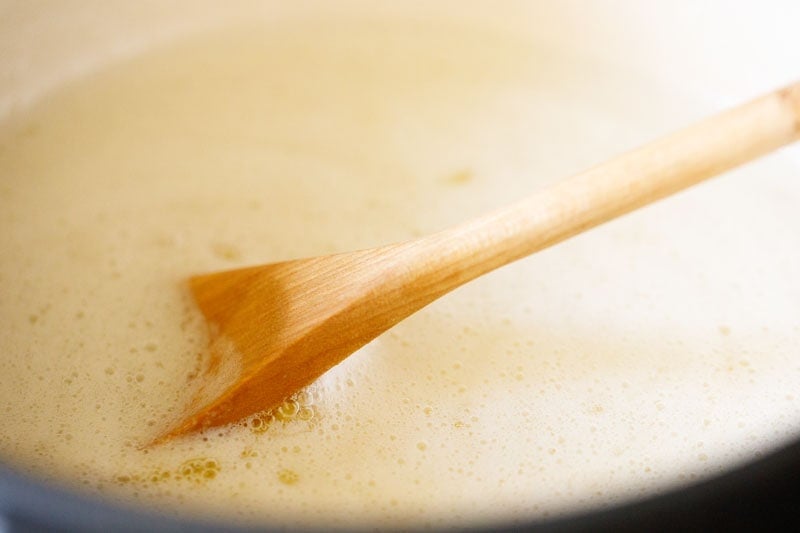
7. Proceed to stir often.
Make Ghee
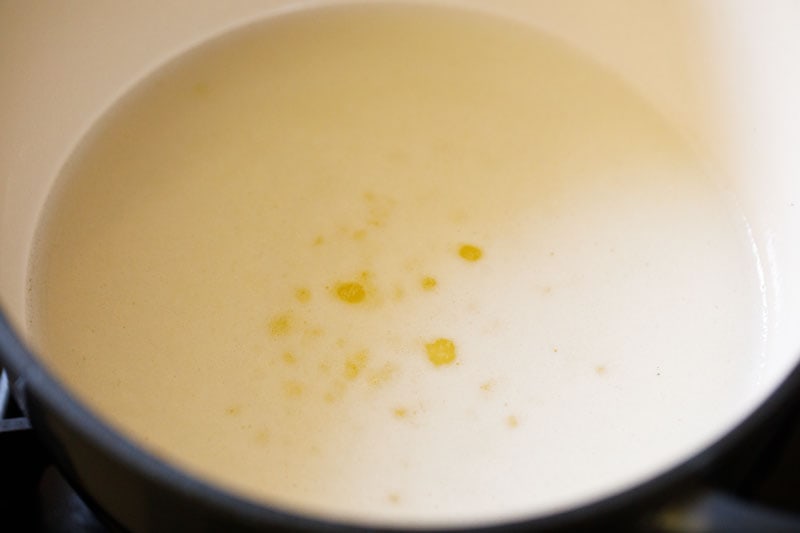
8. After a while, the milk solids will start to settle on the backside and the floor will begin to look clearer.
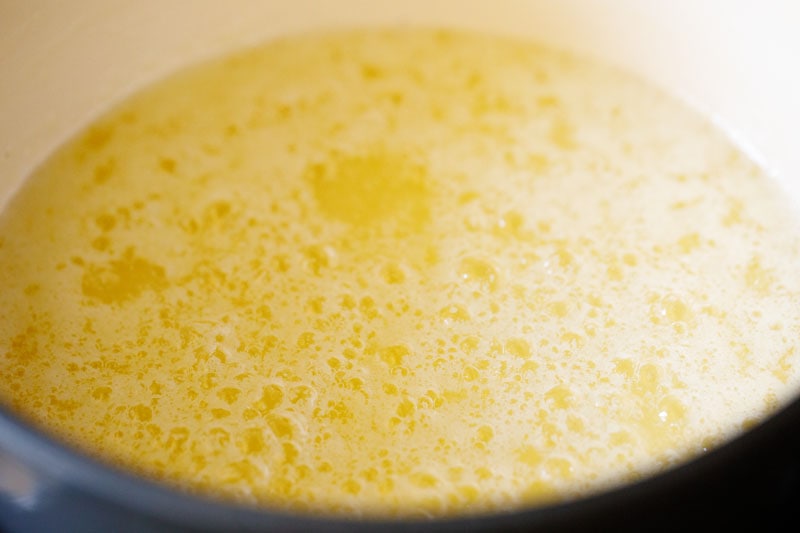
9. Proceed to simmer for a few minutes after all of the milk solids have settled.
Tip: I want to make use of a lightweight coloured pan in order that I can see the colour of the milk solids on the backside once I stir.
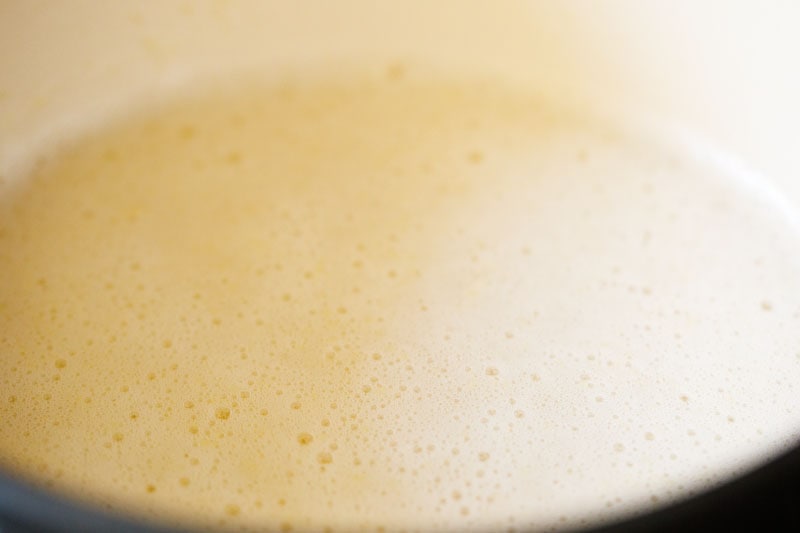
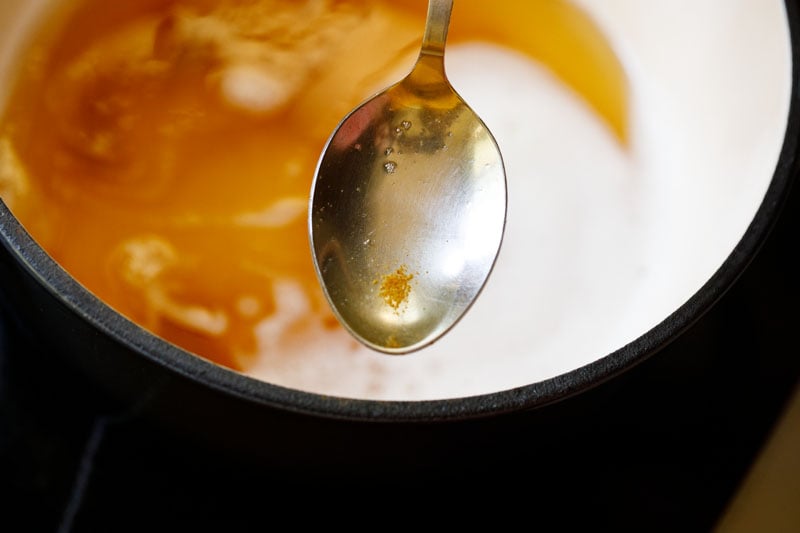
10. Once you see medium to giant sized bubbles forming on the highest and all the combination is effervescent, you might be virtually accomplished! Proceed to simmer for a 1 to 2 minutes extra.
Tip: Should you hold the pan on the warmth for too lengthy, the milk solids will get too browned and even burnt. You have to be attentive right here!
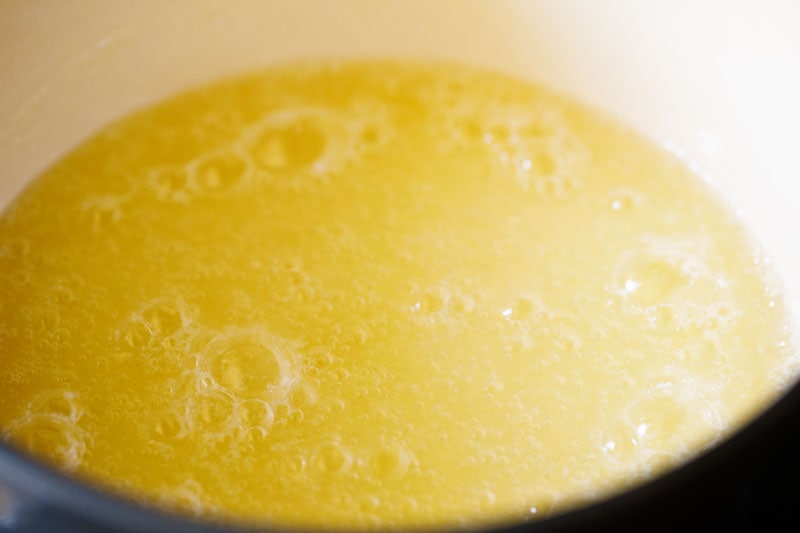
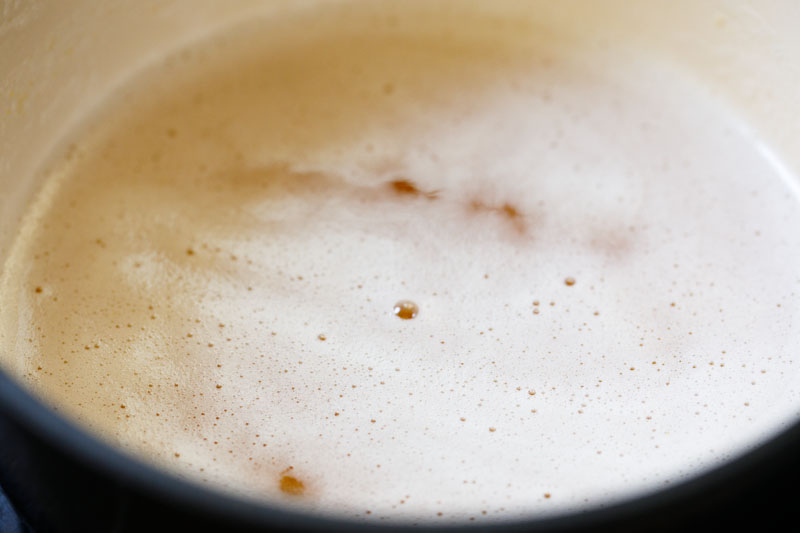
11. Take away from warmth and place the pan on the countertop. You will note a layer of fantastic tiny bubbles on the highest. Don’t fear – these bubbles go away because the ghee regularly cools.
12. The milk solids will start to caramelize and switch golden from the residual warmth, and you will note the colour of ghee turn out to be darker.
13. Wait till all of the simmering stops and also you see the browned bits of milk solids on the backside.
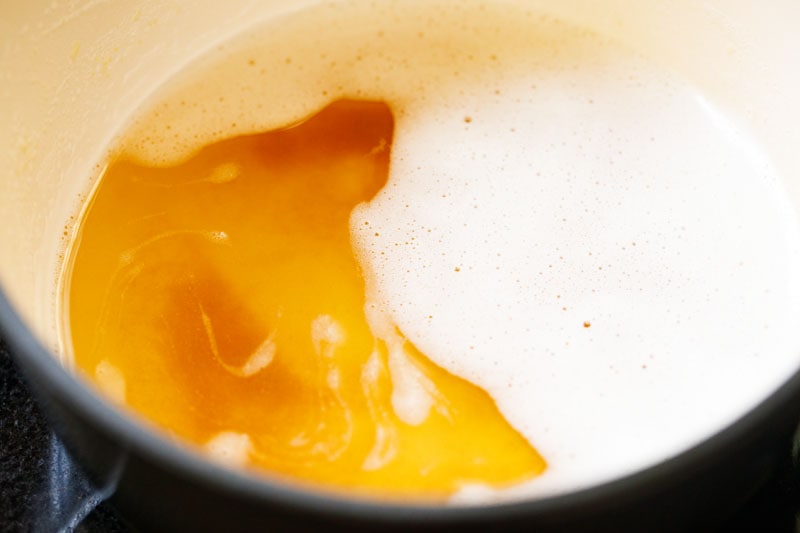
14. Right here is one other photograph of the browned milk solids.
Pressure
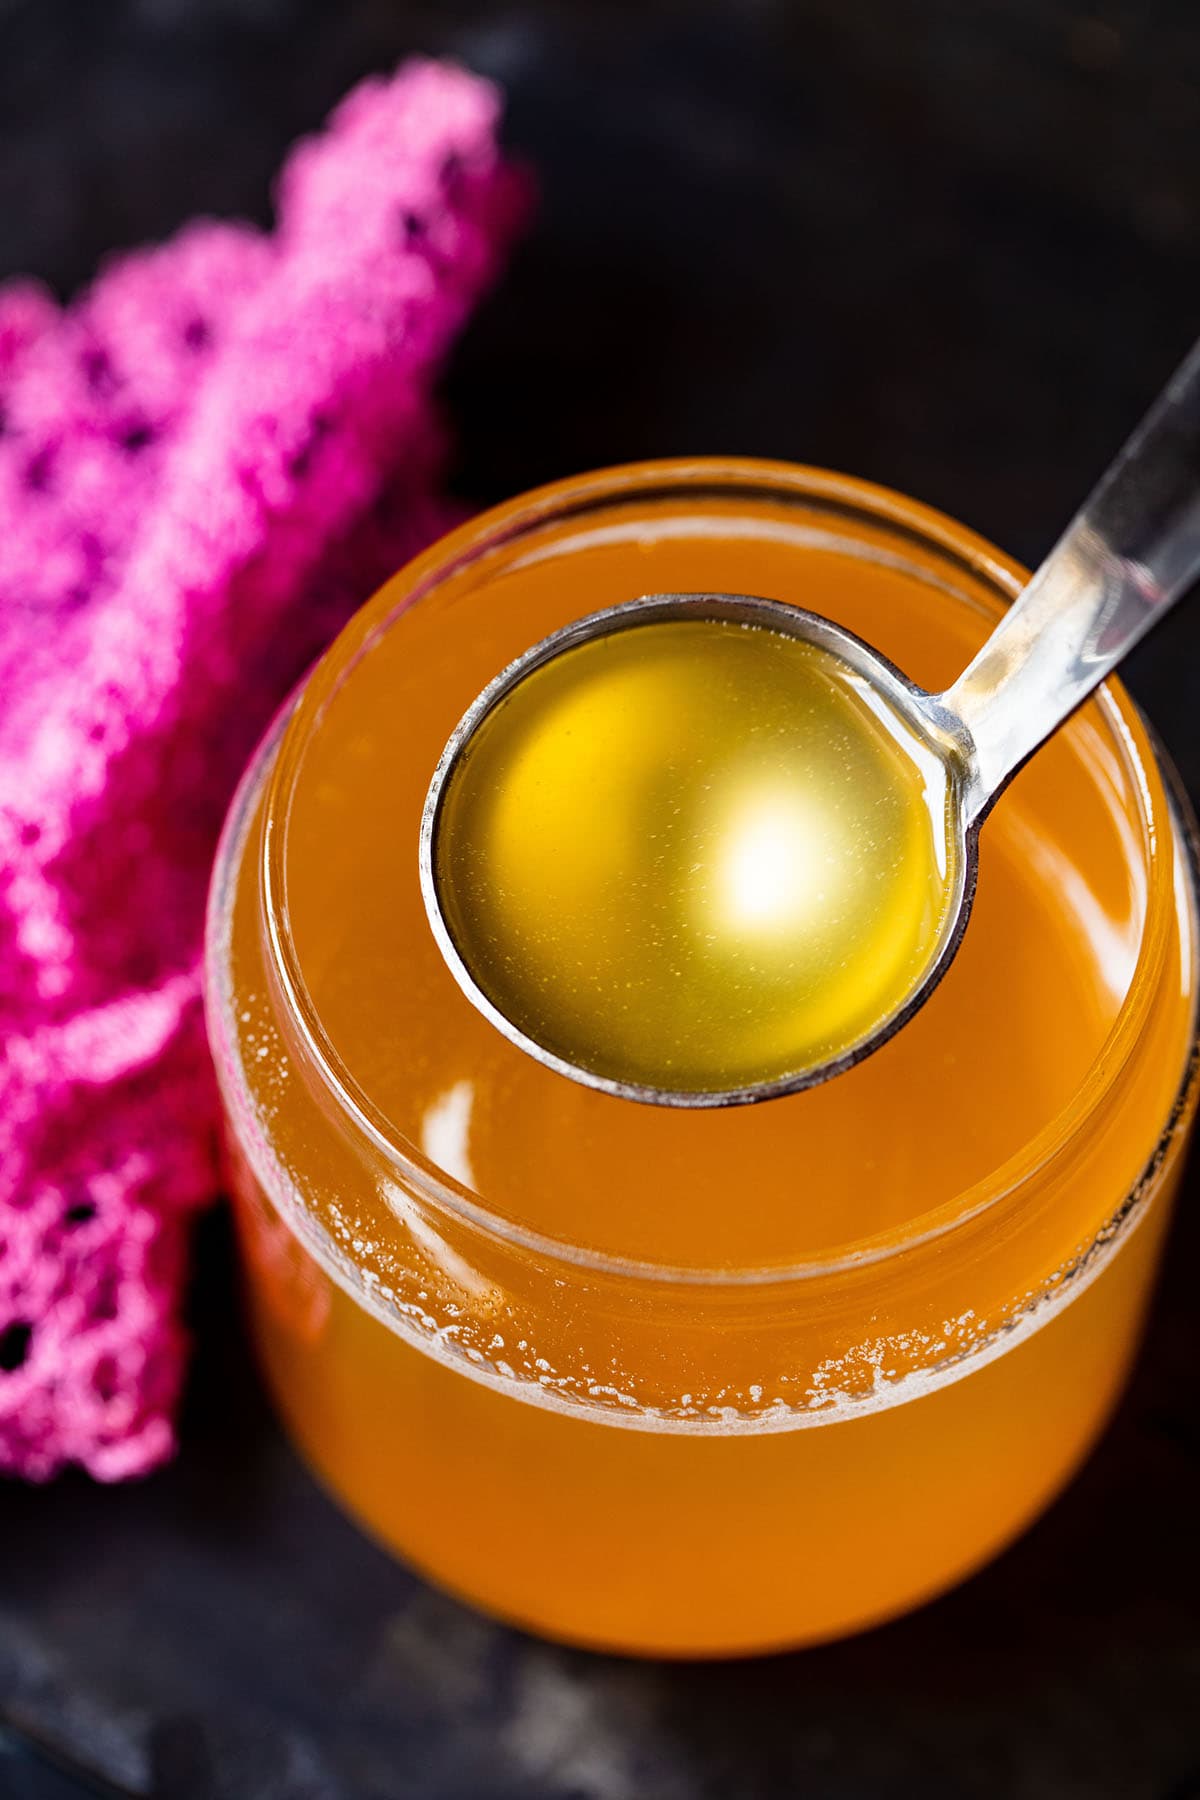
15. Whereas the ghee remains to be scorching, pour it by the strainer or cheese material positioned on prime of a glass jar. In case your pan isn’t very heavy, merely elevate it and pour the ghee. I used a heavy ceramic coated forged iron pan, so utilizing a ladle made this course of simpler.
Tip: Ensure that the glass jars are warmth proof because the ghee will likely be scorching and might shatter glass that isn’t tempered! I discover mason jars are excellent for this. Or you should utilize metal jars.
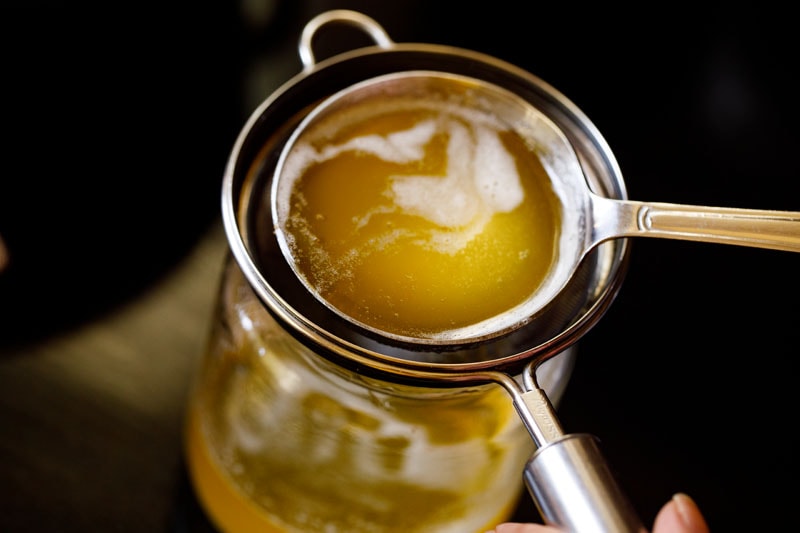
16. Right here’s the liquid gold ghee in a jar. Shut tightly when the ghee cools. Retailer in a cool dry place.

Storage Ideas
Use ghee as wanted. I like to recommend pulling out sufficient ghee for per week or so price of cooking and conserving it in a small container within the kitchen. I normally make ghee from 500 grams butter, which normally lasts me for a few month or so.
Retailer the remainder in a cool, darkish spot within the pantry for greatest storage. If saved properly, ghee can last as long as one yr at room temperature.
In hotter climates, refrigerate it to increase shelf life. At all times use a clear dry spoon to take away ghee so that you just don’t find yourself contaminating it.
When you get the nuances and approach proper, making ghee at house turns into straightforward and easy. And when you understand how to make ghee, you possibly can put together it anytime, wherever.

What Can I Make With Ghee
Loads of Indian meals is made in ghee. We not solely use ghee because the fats to make lentils, curries, veggies and rice based mostly dishes but in addition make lots of our sweets with it. Realizing easy methods to make ghee at house is very helpful in an Indian kitchen.
It’s the popular fats in Indian cooking (even over butter and oil), particularly for sweets and dishes like Biryani and wealthy curries.
- Use it to sauté, stir-fry or roast your veggies. The excessive smoking level of ghee helps whenever you stir fry, bake or roast veggies at a better temperature.
- Toast your bread with it, or unfold it instead of butter in your toasted bread. You may be shocked at how good toast could be with ghee! It’s one among my favourite methods to eat toasted bread.
- Add a number of spoons on prime of Indian meals like Khichdi, Dal Tadka, Kadhi whereas consuming. The great fat in ghee helps to digest the meals simply.
- Unfold it in your Roti or Naan or Pita Bread.
- Roast Paratha in ghee as an alternative of oil.
- Make your Bread loaves and dinner rolls with ghee because the fats.
- Use it in Indian sweets like Carrot Halwa, Kheer, Besan Ladoo and plenty of extra.
- Deep fry your meals in it.
- Bloom or mood your spices in it.
You may as well use ghee for the Ayurvedic follow of oil-pulling!
Totally different Methods of Making Ghee
Whereas I normally comply with the easy recipe above for making ghee rapidly, there are different methods of creating it as properly. Ghee recipe could be made out of cream or yogurt as properly! Learn on under to see the way it’s accomplished.
How one can Make Cultured Butter from Malai or Cream
I used to make ghee with this Home made Butter. Whereas it is extremely scrumptious, it’s rather more time consuming than utilizing bought cultured butter.
You start by first amassing the cream that floats on prime of milk after it’s boiled and cooled. Maintain amassing these layers of cream (known as malai in Hindi) in a freezer secure field. Retailer lined within the freezer.
When you’ve gotten about 2 to three cups of this cream, take away it from the freezer and place the container of it in your fridge in a single day.
The following day, take away the cream from the fridge. Add ¼ cup curd (yogurt) to 2 cups cream and blend properly. Maintain it at room temperature for 9 to 12 hours. This may add some good bacterial tradition to the cream and the cream will thicken and set.
I discover the Immediate Pot helpful on the subject of setting and culturing the cream. Use the yogurt settings and set the time to 9 hours on regular mode. You don’t want to heat the cream earlier than including the yogurt.
When your cultured cream is prepared (after 9 to 12 hours), pour all of it in a blender or stand mixer. Add about ¼ to ½ cup ice chilly water and mix till the butter separates from the cream.
Once you see the butter separating, accumulate the butter with a strainer or clear fingers draining all of the buttermilk.
Tip: Don’t toss the liquid! Retailer the buttermilk and use it to make pancakes or truffles, muffins, or breads.
You now have do-it-yourself cultured butter. Both refrigerate it or use it straightaway to make ghee utilizing the steps for the recipe above.
Ayurvedic Methodology of Making Ghee with Curd
The Vedic or Ayurvedic methodology of creating butter for ghee is completely different than mixing cream. The ghee recipe right here is made out of curd (yogurt) that’s made with the milk from grass fed indigenous Desi cows, and never the extra widespread jersey cows.
This course of additionally requires a specialised hand churner known as a ‘bilona’ (pronounced BEE-low-na).
The curd is added to the bilona pot and is then hand churned by pulling a rope that strikes the rod each clockwise and counter-clockwise.
It’s this shifting of the rods in reverse instructions that assist to separate the butter from the curd. The method of churning in reverse instructions is called ‘manthan‘ in Hindi.
Lately, the method of creating Ayurvedic ghee has been commercialized by using engine pushed bilonas.
Do not try this in a blender as you received’t get any butter. Belief me! I’ve tried and failed. The blender blades transfer in just one course, and in consequence the butter doesn’t separate. So fascinating, proper?
Making Ghee from Cream
Ghee will also be made with cream that hasn’t been become butter. The cream is sluggish cooked and simmered till the milk solids separate, then caramelize and also you get the golden coloured ghee. Simply word that this technique of cooking the cream takes extra time than when you use butter as an alternative.
For higher taste and digestion, you possibly can tradition the cream earlier than making ghee. To tradition the cream, add a number of teaspoons of curd or yogurt to it and let it sit at room temperature for six to eight hours or in a single day.
This fermentation step enhances the flavour of the ghee and can be believed to make it simpler to digest. As soon as the cream has developed a slight tang, you possibly can proceed to churn it into butter or prepare dinner it straight into ghee.
Knowledgeable Suggestions
- Flavoring: Some folks wish to infuse ghee with flavors like moringa leaves, betel leaves, or curry leaves. To do that, add a number of strands of any of those leaves proper after turning off the warmth and putting the pan on the countertop. The leaves will prepare dinner within the residual warmth, flip crisp, and launch their aroma into the fats. Pressure the ghee and discard the leaves or stems.
- Pan Sort: I want utilizing a light-colored pan so I can simply monitor the colour of the milk solids as they prepare dinner. At all times use a heavy or thick-bottomed pan to forestall the butter from burning.
- Be Attentive: Keep away from overheating the ghee. If left on the warmth for too lengthy, the milk solids can brown an excessive amount of and even burn. Keep attentive in the course of the ultimate stage.
- Jars for Storing Ghee: Use heatproof glass jars since scorching ghee can crack common glass. Mason jars work properly for this. You may as well retailer ghee in clear, dry metal containers.
- Scaling: I normally make do-it-yourself ghee utilizing 500 grams of unsalted butter, however you possibly can scale the amount up or down as wanted.
- Storage length: Ghee stays good at room temperature for a few yr when saved correctly. In hotter climates, you possibly can refrigerate ghee to assist it last more.
- Use a clear spoon: At all times use a clear, dry spoon to keep away from contamination and spoilage.
FAQs
What’s the distinction between ghee and clarified butter?
Ghee is usually used interchangeably with the time period “clarified butter,” however it’s truly completely different from clarified butter. In ghee, the milk solids are caramelized which give it a deliciously nutty, virtually candy taste.
Clarified butter, alternatively, refers merely to butter the place the milk solids are merely skimmed off and never caramelized.
How can I taste my ghee?
Some of us wish to taste their ghee with moringa leaves or curry leaves. If you would like a flavored ghee, then add a number of strands of both moringa leaves or curry leaves whenever you place the ghee pan on the countertop.
The leaves prepare dinner and turn out to be crisp, releasing their flavors within the fats. Pressure the ghee and discard the stems or leaves.
How lengthy will ghee final?
If saved appropriately, ghee can final for as much as a yr with out refrigeration. Make sure to hold it away from warmth, gentle and something that may introduce micro organism. If the ghee begins smelling “off,” scrape away the highest layer and transfer it to the fridge for safer storage.
Can I eat ghee if I’m lactose illiberal?
Sure! The method of creating and straining the ghee removes the lactose and casein from the fats, making it completely appropriate for lactose illiberal of us.
Cook dinner and Simmer Butter
-
Take a big, heavy-bottomed pot or pan. Chop butter roughly and place within the pan protecting all the floor of pan evenly.
-
Place pan on stovetop and warmth on medium-low to medium warmth. The butter will start to soften.
-
Stir in intervals when butter begins to soften to help the bigger items. When all of the butter has melted, cut back warmth to the bottom setting and simmer gently.
-
A couple of minute or so after all of the butter is melted, you’ll hear sounds from the underside of the pan and see milk solids showing on the floor.
-
All the floor will likely be lined with milk solids. Proceed to simmer.
-
You will note the colour change regularly to a from a buttery, pale yellow to gentle golden with the butter effervescent and shimmering. Proceed to stir often.
-
After a while, the milk solids will start to settle on the backside and the floor will begin to look clearer.
-
Proceed to simmer for a few minutes after all of the milk solids have settled.
Make Ghee
-
Once you see medium to giant sized bubbles forming on the highest and all the combination is effervescent, you might be virtually accomplished! Proceed to simmer for a 1 to 2 minutes extra.
-
Take away from warmth and place the pan on the countertop. You will note a layer of fantastic tiny bubbles on the highest. Don’t be concerned – these bubbles go away because the ghee regularly cools.
-
The milk solids will start to caramelize and switch golden from the residual warmth, and you will note the colour of ghee turn out to be darker.
-
Wait till all of the simmering stops and also you see the browned bits of milk solids on the backside.
Pressure
-
Whereas the ghee remains to be scorching, pour it by the strainer or cheese material positioned on prime of a glass jar.
-
In case your pan is not very heavy, merely elevate it and pour the ghee. I used a heavy ceramic coated forged iron pan, so utilizing a ladle made this course of simpler.
-
Use ghee as required. I like to recommend pulling out sufficient ghee for per week or so price of cooking and conserving it in a small container within the kitchen.
-
Retailer the remainder in a cool, darkish spot within the pantry for greatest storage. If saved properly, ghee can last as long as one yr at room temperature.
- Flavored Ghee: Some folks want to taste the Ghee with moringa leaves or curry leaves. Should you like flavored Ghee, add a number of strands of both moringa leaves or curry leaves whenever you place the Ghee pan on the countertop. The leaves will prepare dinner and turn out to be crisp, releasing their flavors within the fats. Pressure the Ghee and discard the stems or leaves.
- Pan sort: I want to make use of a lightweight coloured pan in order that I can see the colour of the milk solids on the backside once I stir. Be sure that your pan or pot is heavy or has thick backside, in order that the butter doesn’t get burnt.
- Be attentive: Should you hold the pan on warmth for too lengthy, the milk solids will get too browned and even burnt. You have to be attentive right here
- Jars for storing ghee: Ensure that the glass jars are warmth proof because the Ghee will likely be scorching and might shatter glass that isn’t tempered. I discover mason jars excellent for this. You may as well retailer Ghee in metal jars.
- Scaling: Whereas I make Home made Ghee with 500 grams of unsalted butter, you should utilize any amount of butter.
- Be aware that the approximate vitamin knowledge is for 1 teaspoon of ghee.
Energy: 43kcal | Protein: 1g | Fats: 5g | Saturated Fats: 3g | Ldl cholesterol: 13mg | Sodium: 1mg
How one can Make Ghee recipe from the archives was initially revealed on August 2021.

